


Spirit recently installed solar PV at the new home of one of our sales team. Since there’s no better way to live and breathe the technology than through personal experience, Mark shares his take on the process of installing SunPower panels with an integrated GSE mounting system.
Getting started
The first step to my process after enquiring for solar panels, was receiving a quote based on a satellite image from Google, which gave a standard system layout with a small, medium and large option. After this initial desktop quotation, I had a more in depth sales survey, which involved taking measurements of the house and checking cable runs, as well as discussing any questions about the installation.
An integrated system
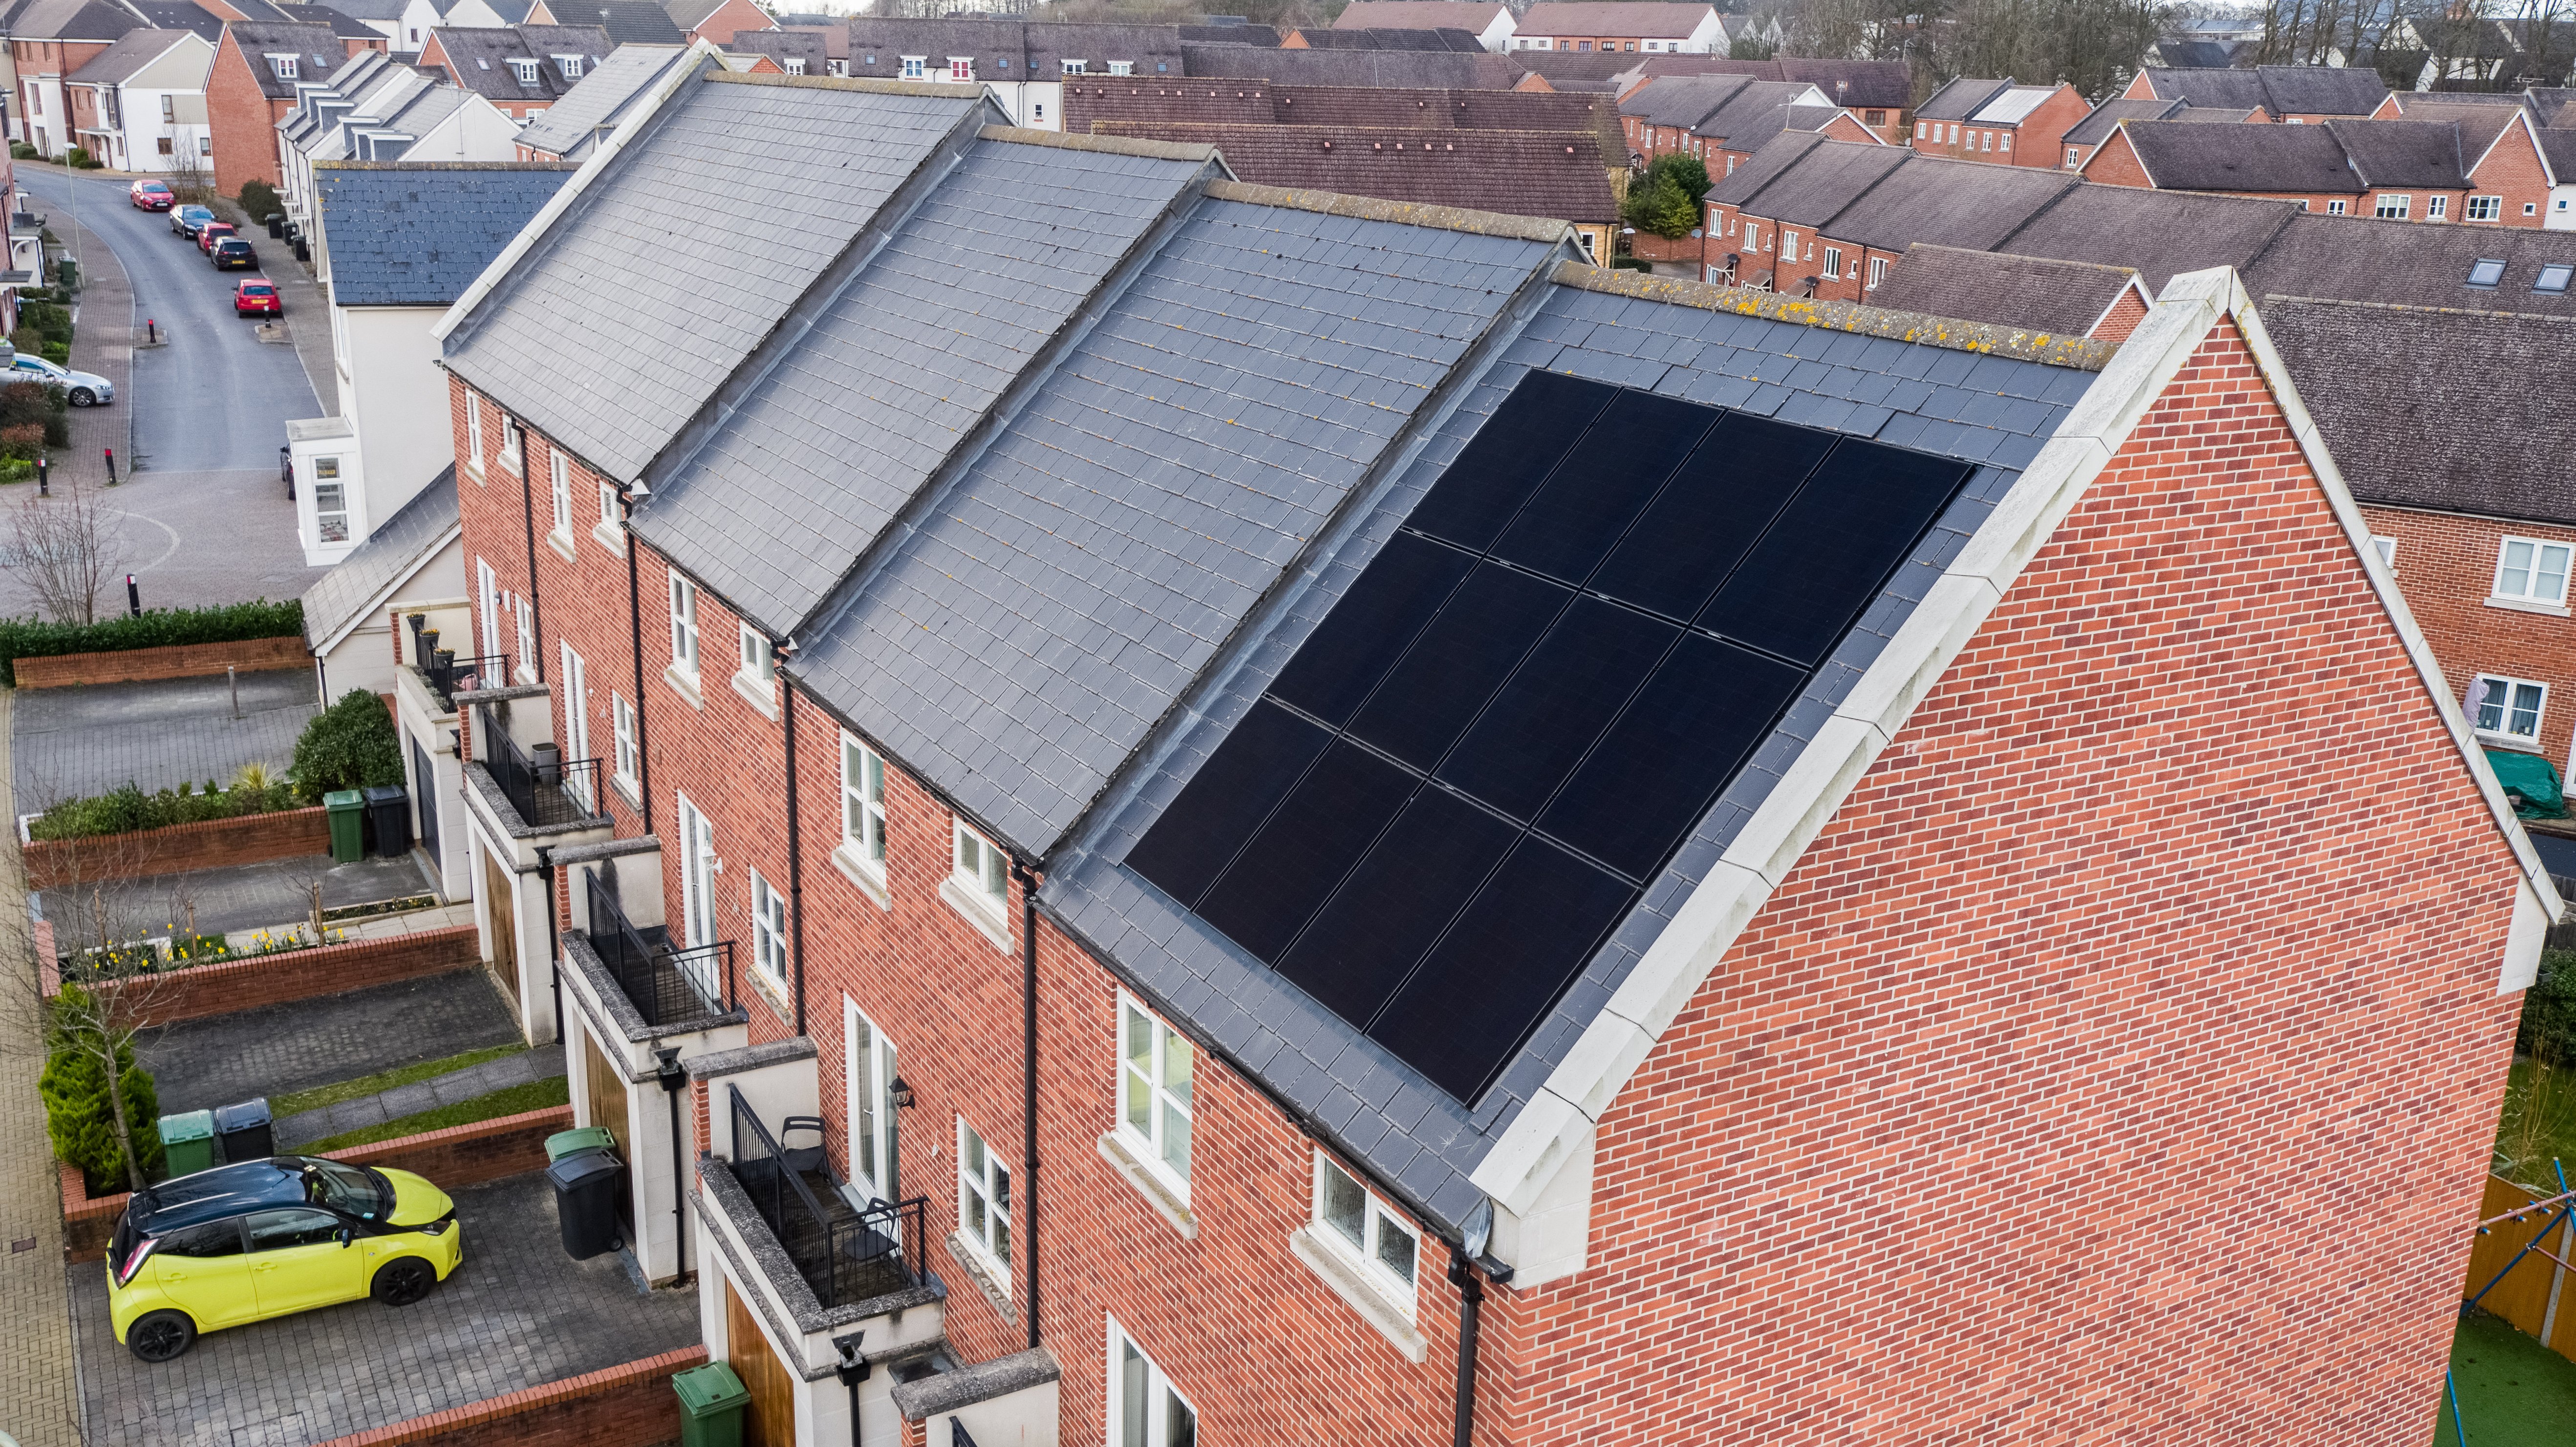
After this, I received a final firmed up quote for the in-roof SunPower and GSE system I ordered. The GSE in-roof mounting system means there are no tiles beneath the panels. The reason for this was that the tiles were interlocking slate tiles, which are tricky to work with. It is a similar cost to have the tiles stripped back, and the panels and their mounting pods fitted directly to the battens, with the felt below.
The other benefits of this racking system is that it has a much cleaner finish compared to a traditional on-roof mounting system. There is also no gap beneath the panels for pigeons or squirrels to nest underneath. Lastly, because there are no tiles underneath, the roof will not need strengthening if there are any structural issues on the roof, as PV panels are nearly always lighter than roof tiles.
It is worth noting there is a small reduction in output from having panels set into the roof line, as they have decreased ventilation, so the panels heat up more in the sun. To help with this reduction, I chose all-black SunPower 350W panels to increase the total output of the system over its lifetime and keep the system looking good against the grey tiles at the edge.
Permissions and technical survey
As the inverter was over 3.68kW, grid permission needed to be obtained prior to the installation, so at this point the 11 week DNO application was filed.
While the application was being processed, there was a technical survey from Spirit’s head installer, who checked the spacing of the panels, and conducted earthing and bonding checks on the property. He also took measurements of the rafters in the loft space to pass to a structural engineer, who could sign off the roof after calculating that it was able to take the weight of the new panels. The placement of the inverter was confirmed to be in the garage rather than the loft, along with the necessary cable runs.
It was also decided to string the system up vertically rather than horizontally to help with any potential shading from the small wall on the right hand side.
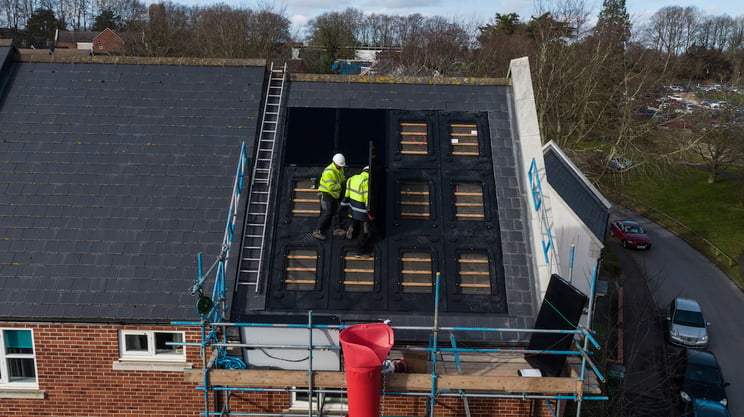
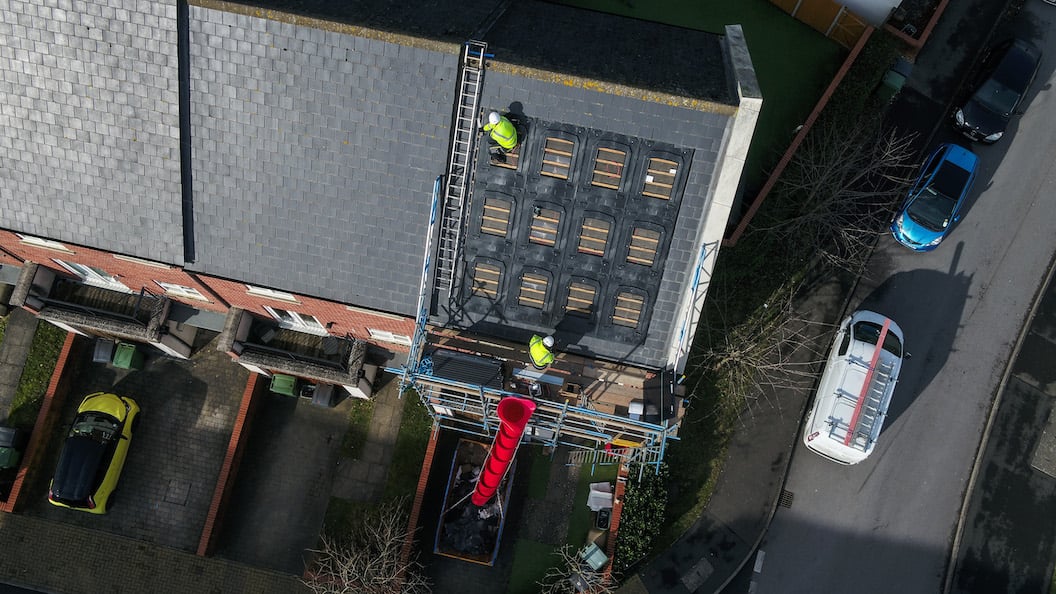
The installation
After 11 weeks, permission was finally granted from the DNO, which meant we could arrange a date for the installation. Scaffolding went up at eaves level on a bright sunny Friday morning in February, with the installation booked in for Wednesday and Thursday of the following week. The scaffolding had two storms to contend with (Ciara and Dennis if you remember?) and I am pleased to say it remained firmly in place! The panels arrived Wednesday morning, and unfortunately one of panels in the pallet arrived cracked. This was replaced by Spirit the next day at no extra charge, making sure the installation was not delayed.
Wednesday was spent stripping back and cutting the roof tiles, slowly filling up the skip on the drive and fitting the electrics. By the end of Wednesday, the inverter was fully installed. Cabling ran from the garage, up the front of the house and into the loft space, tracking the rafters and finally tucking under the felt to reach the panels. A rectangular plastic sheet covered the roof to keep it watertight for the night.
On Thursday the GSE pods and flashing went in as the roof started to take shape again. Soon after, the SunPower panels were fitted in one by one. By the end of the day, the installation was complete!
Monitoring
The inverter communicates wirelessly with my WiFi hub, which means whenever it is sunny, I am compelled to open up the app to see what is being produced at that moment. It’s been interesting watching how the smart meter does not increase for a change, despite most of the household appliances being switched on!
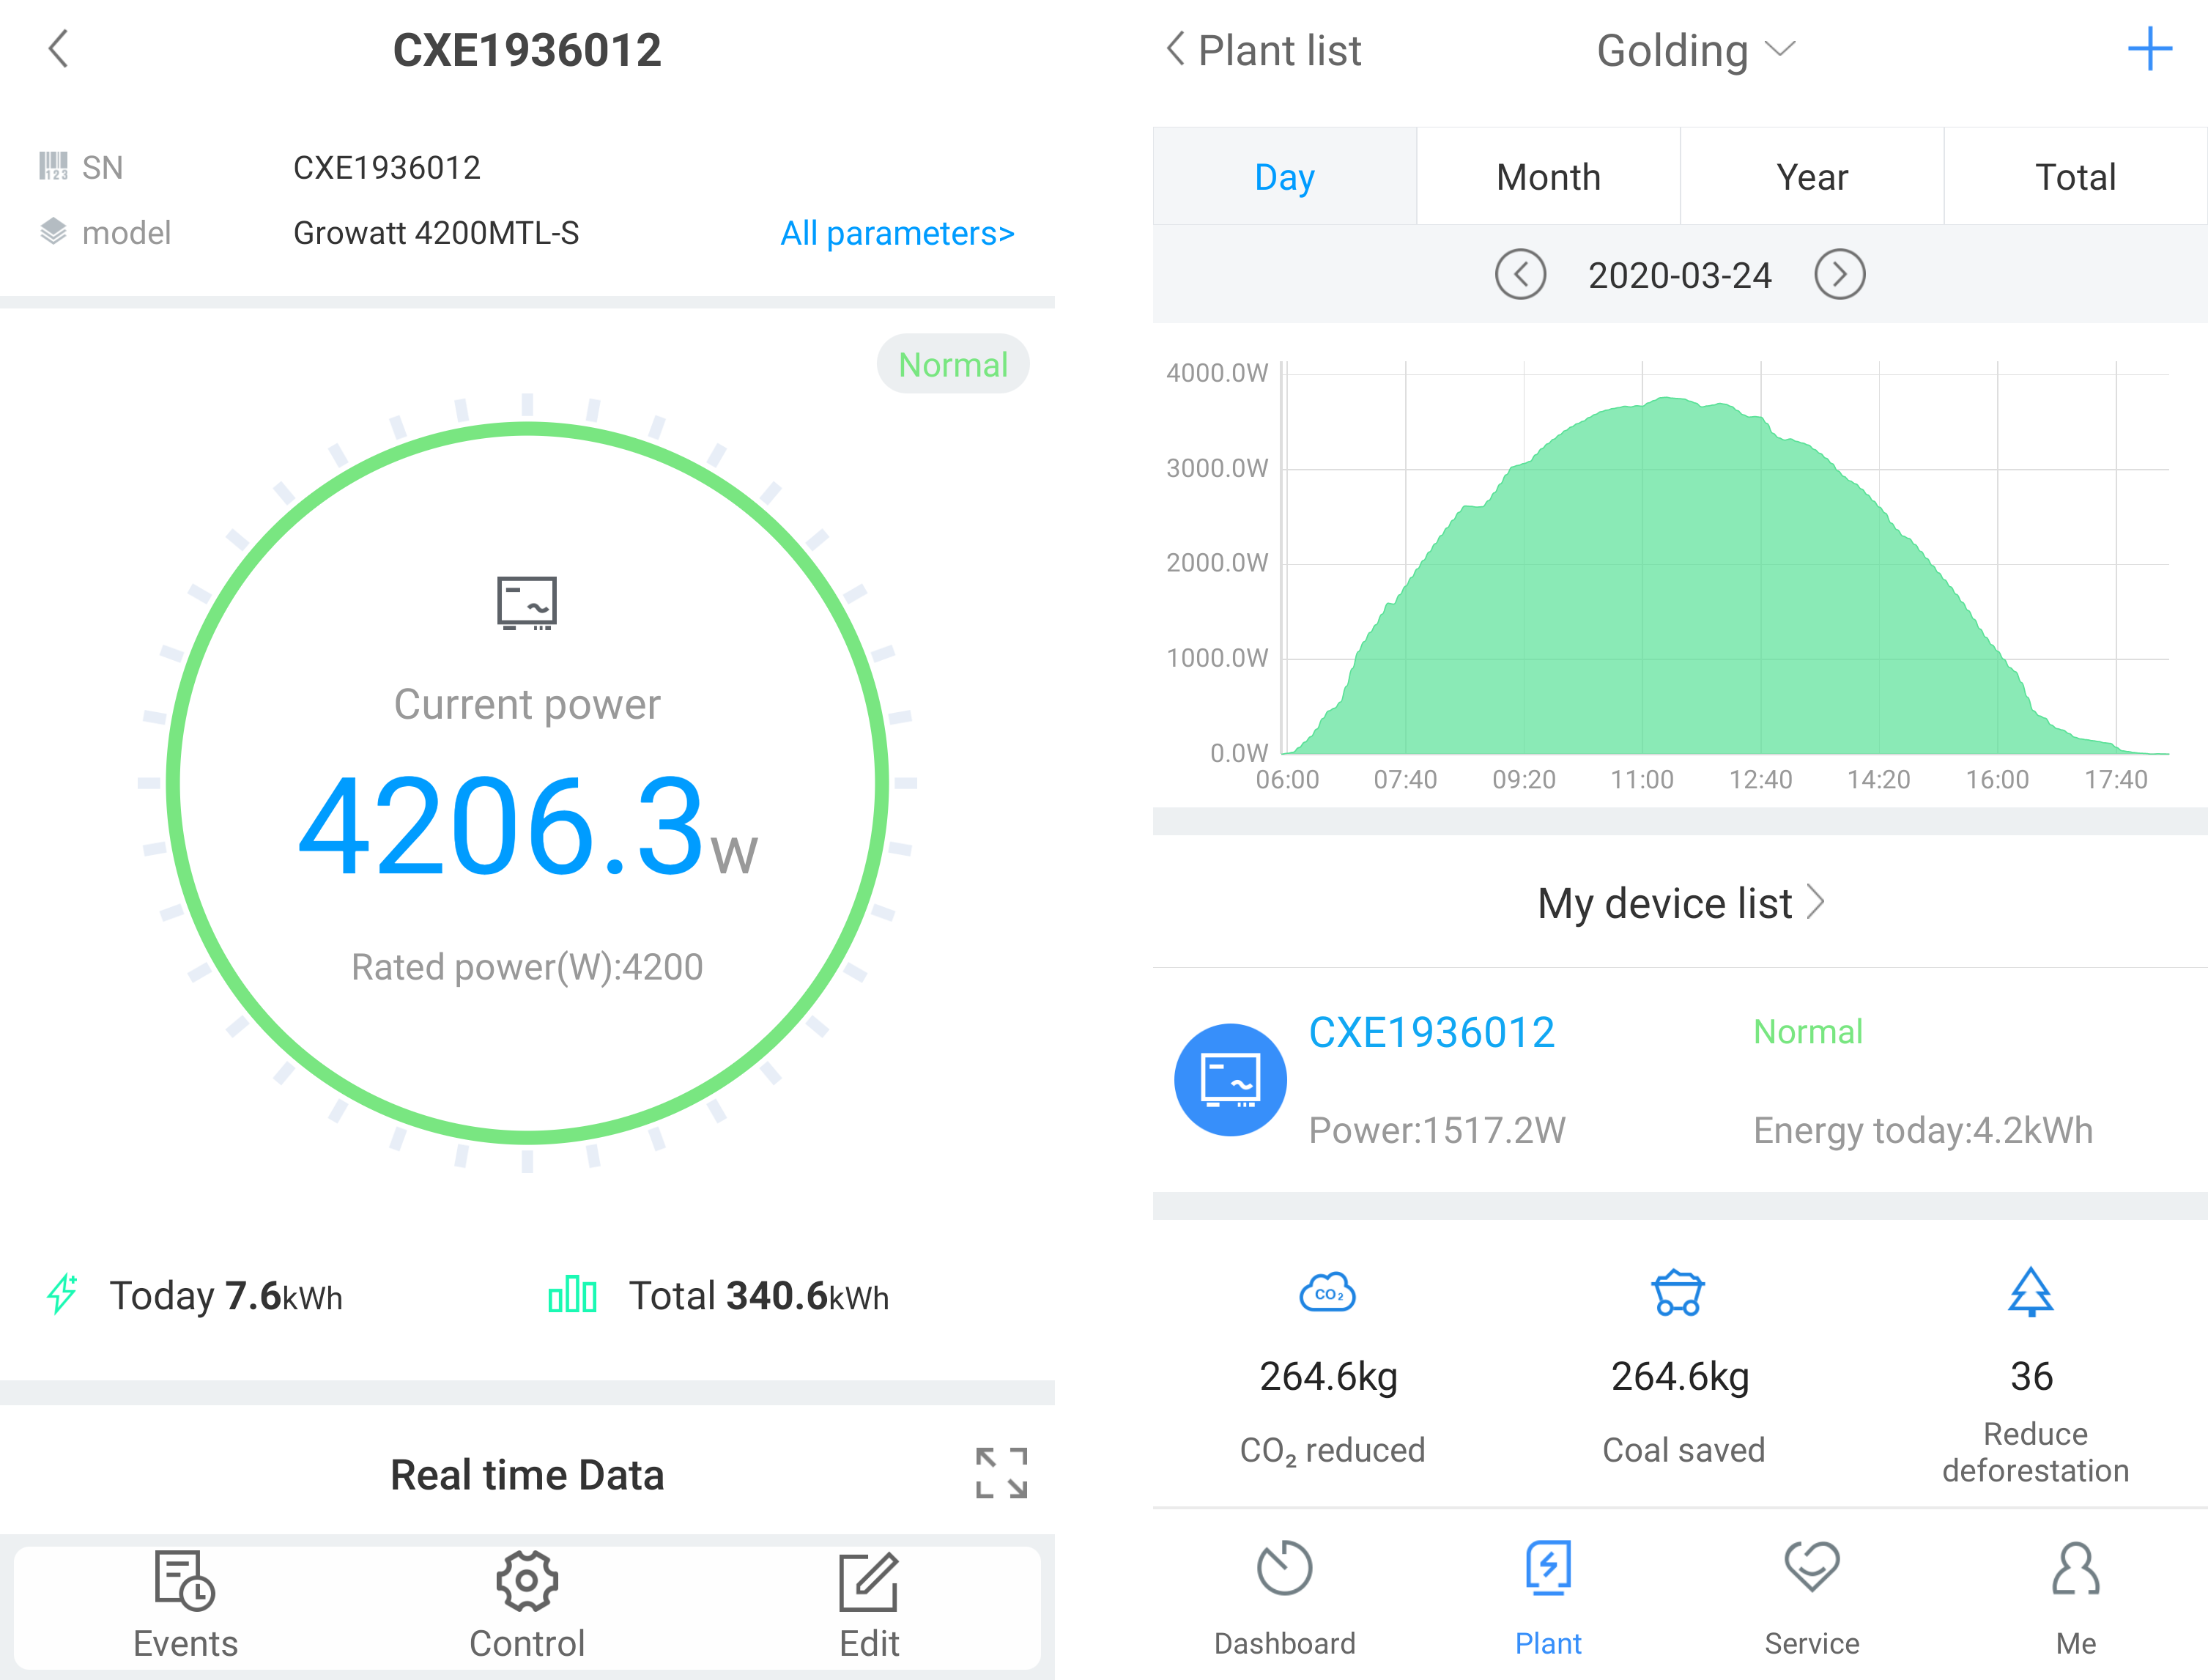
Octopus have booked me in to upgrade my smart meter to a SMETS2 one that can measure live export, so when it is fitted I’ll get paid a variable rate each half hour depending on the market rate for energy. I did have the choice of getting a flat rate 5.5p/kWh as well, which is one of their other Outgoing export tariffs. My energy tariff is staying on a fixed rate 15p/kWh though, so there’s a larger saving to be had from using my own energy on site if I can - this means I should turn on devices when it is sunny.
Expanding the system in the future
A Tesla Powerwall 2 battery was on the cards, and it would feel great to use all my own generated energy on site and make sure power cuts are a thing of the past, but ultimately my budget did not stretch to it. My plan is to get a zappi home electric vehicle charging point that can trickle charge directly from the panels to an electric car, once my current car needs replacing and the government forces us all to make sure our next car is fully electric!
Even if a new Tesla Model 3 isn’t on the drive in the next couple of years, the system is expected to generate 4,242kWh. The EPC rating of my house has increased to a much desired ‘A’ band should I ever come to sell, so there are other benefits too beyond those decreased bills.
Since a lot of us are working at home during the daytime, it does feel nice knowing my computer is being powered by my roof as I type this out now!

Read more about how Mark is getting on in his follow up post, reviewing the first year of living with solar panels.


